If you’ve ever wished your favorite plant would clone itself, Sedum is about to be your dream come true. These hardy, chubby-leaved succulents don’t just thrive with minimal care—they also happen to be some of the easiest plants to propagate.
Whether you’re growing upright varieties like Sedum matrona or sprawling ground covers like Sedum angelina, the methods below work across the board. Creeping or clumping, indoor or outdoor—Sedums are propagation powerhouses.
Ready to turn one plant into many? Let’s get into it.
Table of Contents
Leaf cuttings: A simple start
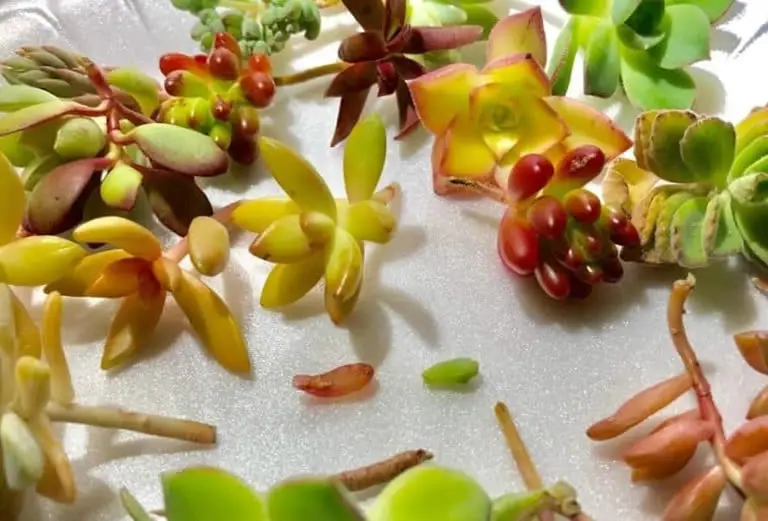
One of the most straightforward ways to propagate Sedum is by using individual leaves.
This method works especially well for smaller, plumper-leaved varieties like Sedum burrito and Sedum morganianum.
Here’s how to do it:
-
Gently twist a leaf off the stem, making sure it comes away cleanly (damaged leaves won’t root well).
-
Let the leaf callous over for a day or two. This helps prevent rot.
-
Place the leaf on top of dry, well-draining soil. Don’t bury it—just let it rest on the surface.
-
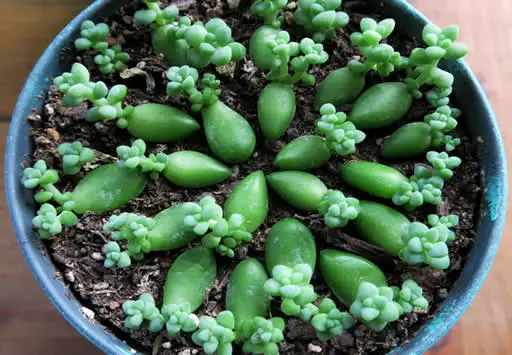
Mist lightly every few days and wait. In a couple of weeks, tiny roots and a new baby plant will emerge at the base.
Once the baby is a bit more established, you can pot it up individually and care for it like a mature Sedum.
Stem cuttings: Instant gratification
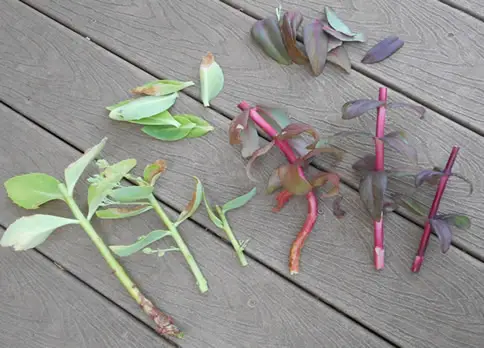
For upright varieties like Sedum autumn or Sedum matrona, stem cuttings are the go-to method.
Here’s the step-by-step:
-
Use clean scissors or garden snips to cut a healthy 3–6 inch section of stem.
-
Remove the lower leaves from the bottom inch or so.
-
Let the cutting dry and callous for a day or two.
-
Plant the stem upright in a pot with dry succulent soil and water lightly after a few days.
Stem cuttings usually root quickly and begin growing within a couple of weeks—especially if given plenty of sunlight.
Division: Ideal for mature or spreading plants
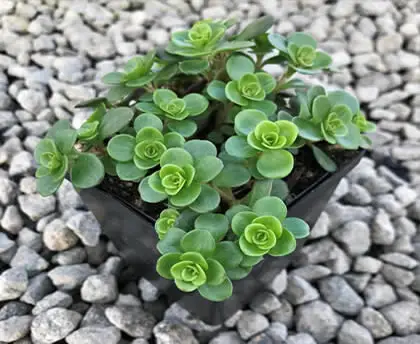
If your Sedum has formed a thick mat or cluster (like Sedum angelina, lemon coral, or stone step sedum), division is a super easy way to create new plants.
How to divide Sedum:
-
Gently lift or dig up a section of the plant.
-
Pull apart clumps or sections with roots attached.
-
Replant the divisions in fresh soil—either in new containers or a new spot in the garden.
This method is perfect for rejuvenating older plants and filling in empty spots fast.
Self-rooting: Let Sedum do the work
Many creeping varieties naturally root wherever their stems touch the soil. In these cases, propagation is effortless.
What to do:
-
Look for rooted sections on the stem.
-
Snip off a section with visible roots.
-
Pot it up or replant directly in your garden.
You can also press longer stems onto the soil to encourage rooting, then divide once roots have formed.
Water propagation: Doable, but not preferred
While Sedum can technically root in water, it’s not the ideal method.
These plants are prone to rot when kept too moist, and water roots often don’t transition well to soil.
If you do try it:
-
Use only stem cuttings, not leaves.
-
Let the base callous first, then place it in a jar with just the bottom inch submerged.
-
Change the water weekly and move to soil once roots appear.
For better results and lower risk of rot, stick to dry soil methods.
Propagating Sedum outdoors: Nature’s way
If you’re lucky enough to grow Sedum in your garden, you’ve probably seen it start to spread or self-propagate on its own.
Outdoors, these plants practically do all the work for you.
Here’s how to get the most out of outdoor propagation:
-
Use any method above—leaf cuttings, stem cuttings, or division—directly in your garden beds.
-
Choose a sunny, well-drained location. Sedum doesn’t like soggy soil.
-
After placing cuttings or divisions in the soil, avoid watering for a few days to allow calloused ends to adjust.
-
In dry climates, lightly mist cuttings every few days until established.
-
Creeping varieties like Sedum golden moss, lemon ball sedum, and Sedum treleasei will root and spread naturally—just snip and replant where you want them to grow.
Outdoor propagation works best in warmer months and in USDA zones 5–11 depending on the variety.
If you’re in a cooler zone, start your propagation in pots and overwinter indoors.
Caring for new Sedum plants
Once your propagated Sedum has taken root, it’s time to treat it like an established plant:
-
Place it in bright light (full sun if outdoors, south-facing window if indoors).
-
Water only when the soil is bone dry.
-
Avoid fertilizing until it’s had a few weeks to establish.
- Use a cacti fertilizer, like this one.
From tiny leaves to full-grown succulents, these plants grow surprisingly fast once rooted—especially when given plenty of sunshine and not too much water.
Be sure to read our Sedum care guide for a more in-depth look at the care requirements of these succulent plants.
Final thoughts
Sedum propagation is one of those gardening joys that’s rewarding, beginner-friendly, and a little bit addictive.
Whether you’re snipping stems, pulling apart clumps, or watching a single leaf turn into something beautiful, it’s a simple way to grow your garden—or your collection—without spending a dime.
Let me know if you’d like this turned into a visual guide, printable, or included in a care bundle for your readers!