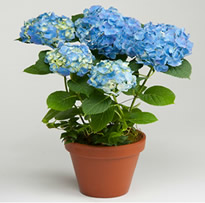
How To Plant Annuals In The Ground For Yearly Blooms
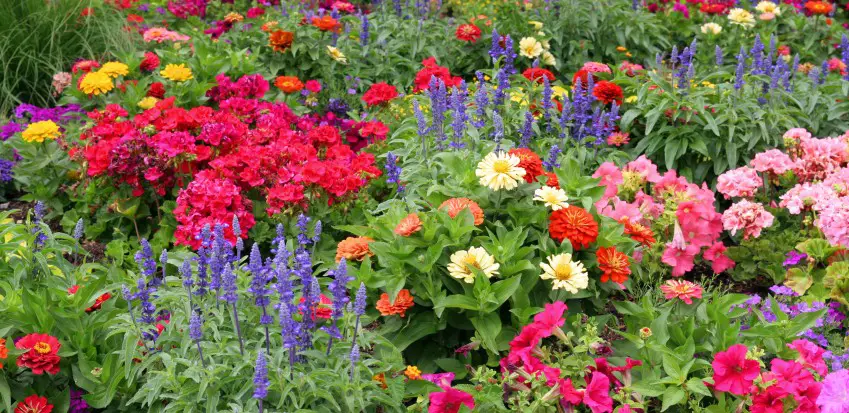
Annuals are a great colorful way to brighten up any garden landscape. But now that you’ve decided to plant annuals in your garden how do you plant them?
Planting annuals in the ground is a fairly easy process.
However, there are a few different things to consider before beginning.
- There are different procedures for growing annuals from seed than there are for replanting potted annuals.
- Seeds need to be planted earlier in the year and require some additional preparation.
- Potted annuals can be planted directly into the soil but should be acclimatized first.
- Propagating cuttings in the ground requires a completely different approach and some preparation.
Let’s look in more detail at how best to plant annuals directly into the ground to ensure successful blooms every time.
Table of Contents
- Consider the different planting options before you begin
- The 3 essential things that will determine where you plant your annuals
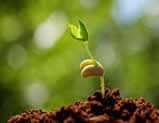
- How To Plant Annuals In The Ground Using Seeds
- Pick annuals suited to your soil type & local climate
- Depending on your location you may want to choose cold-resistant annuals
- Take into consideration the size of the seeds
- How to plant your annual seeds directly into the ground
- Germination will usually take place after 4 weeks
- The time between germination and blooming will vary from plant to plant species
- How To Replant Potted Annuals In The Ground
- How To Plant Annuals In The Ground Using Cuttings
- Aftercare Of Your Planted Annuals
Consider the different planting options before you begin
There are many different varieties of annuals to choose from but regardless of which ones you choose you can safety follow the same procedures for planting all of them.
However, how you plant your new flowers will greatly depend on the way you intend to grow your annuals. There are different procedures to follow when cultivating new plants from either seed, cutting or for planting more mature plants from pots.
I know most people reading this will want advice on how to plant annuals that are already grown and in pots but for those of you who are a little more ambitious and want to grow from seed or stem/cutting I have included the relevant advice.
If you just want to know how to replant annuals from a pot to the ground you can skip ahead though you may miss out on key information for cultivating your new plants properly.
The 3 essential things that will determine where you plant your annuals
Annuals are a very easy to grow plant type. They require very little tending and look absolutely stunning in any garden space.
There are just a few things to consider before you start planting though if you want to get the best from your gardening efforts.
1. Sunlight is crucial for annuals
Annuals need plenty of sun to thrive.
So you should always plant them in an area of your garden that gets the most sunlight.
They can grow in shaded areas but try to avoid anywhere that is gloomy or especially dark/shaded.
2. Just enough water but not too much is needed
Annuals do not like very wet soil but they do require regular watering.
Make sure your garden is properly aerated to allow for good drainage and follow the advice on watering below.
3. Choosing the right annuals for your location is essential if you want yearly blooms
Annuals thrive in moist but well-drained soil that has a pH value between 6.3 and 6.7.
Obviously testing the ph value of your garden soil is probably more than most people want to do although it is very easy to do with with a simple ph soil tester and the soil ph value is fairly easy to change as well.
 You can also add a few inches compost or peat moss as natural fertilizer to your garden soil (or just fertilize the soil) to help build-up a healthy environment for the plants to grow.
In addition, you will also need to choose annuals that are best suited to your local climate – especially as that related to rainfall and temperatures (more on this later).
How To Plant Annuals In The Ground Using Seeds
When planting annuals, or any flower, from seed the process you follow is slightly different from the one you would follow for planting from a pot.
Obviously, the plant needs time to germinate and grow so the planting of seeds will be well before you would re-plant a grown potted annual.
Most annuals can be planted just prior to spring, as the winter is coming to an end, and during the spring months.
There are several things to consider if you intend to plant from seed.
Pick annuals suited to your soil type & local climate
Always check your soil before you pick annuals to plant.
By choosing annuals that are the best adapted to your yard soil you give yourself the best chance of cultivating a beautiful flowering garden.
When planting from seed into pots or containers, for later replanting into your garden, be sure to use a potting soil.
If you intend to plant the seeds directly into the ground then you should follow the procedure for preparing seeds set out in this article.
Depending on your location you may want to choose cold-resistant annuals
Hardy annuals seeds can be planted directly in the ground as early as very late winter and very early spring.
After germination the seedlings will usually be able to tolerate a light frost and temperatures down to about 25 degrees F. If temperatures start to fall below that then you may need to take precautions against frost.
You can sow half-hardy annuals directly into the ground in the later spring weeks when the weather has gotten warmer.
If you want to start them earlier than this, for an earlier bloom then you will need to sow them in pots or containers (such as a plastic propagator or if you are placing them in a very cold environment it may be wise to use an electric propagator
) and keep them indoors 6 to 8 weeks before transplanting.
Take into consideration the size of the seeds
When planting annual seeds directly into the garden the seed size can become problematic.
What do I mean?
Well some seeds are a lot smaller than others.
 Small salt-particle-sized seeds like petunias and snapdragons and orchids (where a single seed can be the size of a speck of dust) it can become very troublesome handling them.
The problems occur when you you try to sow these dust-like seeds directly into the ground.
Seeds can be blown away and scattered to areas where you don’t want the plants to grow and it is also all too easy to cluster the seeds in an area where they will grow together.
So, rather than having nicely evenly spaced flowers you get a small clusters of flowers and big empty spaces to either side of them.
For this reason I advise you to either grow very small seeds in pots first and then replant them when they are large enough to handle properly or simply buy grown potted plants from your local garden center or nursery.
How to plant your annual seeds directly into the ground
Dig up some soil in the garden to about a 2″ depth.
Layer the bottom of the hole with some potting soil and put your seeds on top of it spacing them out from one by about 3/4 to 1 inch though the seed packet will give you more accurate directions for each plant type.
Cover the seeds with more potting soil.
Although the potting soil is completely optional it will greatly increase your germination success rate.
Germination will usually take place after 4 weeks
Be sure to read the seed packet before you throw it away as not all annuals will germinate at the same time.
 Seeing some seeds germinate while others leave the ground looking barren can be disconcerting to a new gardener but it may just be that those particular seeds take longer to germinate.
Most of your annuals will begin germinating and breaking through the top soil in just a few days while others will take a week or even up to 4 weeks before you see any sign of life.
The time between germination and blooming will vary from plant to plant species
Many new gardens get frustrated when they see plants germinate and sprout as seedlings from the ground quickly but see no flowers after a long time.
Although many annuals will germinate very quickly it still takes time for the plant to mature enough to be able to bloom and produce flowers.
In many cases you may have to wait up to 90 days before you see any flowers when you grow from seed.
How To Replant Potted Annuals In The Ground
Growing plants from cuttings is such a rewarding aspect of gardening that you should really try it at least once.
Annuals are fairly easy to grow from cuttings as long as you prepare the growing environment correctly and treat the cutting before planting.
Your soil & local climate should determine your choice of annuals
WAs as it is vitally important when planting annuals from seed, when propagating a plant from a cutting it is important to use the right annual for your soil.
Potting soil is a must-have if you want to successfully grow a healthy plant.
I personally use miracle grow but most modern potting soils offer enough nutrients and mixture of ingredients to do the job well, so sourcing any type from your local garden center should be sufficient for your needs.
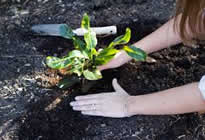
Planting annuals in the ground that have been cultivated in pots – replanting
 Planting annuals into the ground directly from pots is probably the easiest way to populate your garden with these color flowering plants.
But, there are still some precautions you need to follow and ways to do this that will greatly increase the success rate of the plants.
Consider acclimatizing your annuals before replanting them
Acclimatizing plants is often an overlooked step by new gardeners but it will give your plants a much higher chance of thriving in their new environment.
Simply take your potted plants outdoors for a few hours every day over a period of 2 – 3 days. After that, every day over a 4 – 5 day period increase the length of time they stay outside until on the 7 day leave them outside overnight.
During this time you should also gradually introduce the plants to full sunlight making sure they are not bombarded with sunlight at the very beginning.
On the eight day you can replant them into the ground.
This process of acclimatizing is especially useful for seedlings though even mature plants will benefit from it.
The best time to replant potted plants in the garden
You should aim to plant mature annuals from pot to garden in the spring or early summer.
 Don’t do it when the weather is still a little chilly.
Also try to avoid doing it when the weather is very hot as the change in environment and temperature may shock the plant so much that it doesn’t recover.
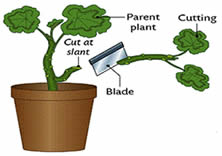
How To Plant Annuals In The Ground Using Cuttings
Always cut a stem from a long healthy stem. The cutting should be at least a few inches long.
Cut at an angle.
Before placing the cutting into the soil dip the cut end into a growth hormone rooting gel, such as Clonex, and then also dipped into a rooting hormone powder like TakeRoot
. In my experience following this simple step will increase your growth rates by about 80% – 90%.
In fact I have found it so successful that I often put some hormone powder into the area where I replant potted plants to give the roots some TLC after being replanted.
To be honest I do not know if using growth hormone on an already developed plant helps or not but since I started doing it I have never lost a replanted plant.
 After you have prepared the cutting simply plant it so the lower treated part of the cutting is planted at least an inch below the surface.
To do this use a screwdriver or stick to punch a hole in the ground and then simply place your cutting into it (after being dipped in rooting gel and powder).
Firm down the soil around the cutting to give it support and water both the cutting and the soil around it gently with a spray bottle.
Prepare the yard soil before you begin
Take a small garden fork and loosen up the soil.
At this stage I put a little hormone powered into the hole.
Loosen-up the roots of the annuals to be replanted
Before you do anything with the plant make sure it has been watered a few hours beforehand and the soil is moist.
Tip the pot upside-down with one hand ensuring you cradle the plant in your other hand so it doesn’t fall out. A drop to a plant can have the same effect as a drop to any living organism and the shock of the impact could kill it.
Now that you have the plant removed from the pot it grew in you need to carefully separate the roots.
Don’t tug on them or you will damage them! Just gently tease the roots apart a little.
As the plant has been growing in a very restrictive environment the roots will have become intertwined and bunched up. By simply separating them slightly you give them a much better chance of growing successfully in a new environment.
Your goal is just to undo any knotting of the roots and to spread them out a bit. Don’t stress over this. Just gently work the roots apart.
This simple quick step can make all the difference to the growth rate of your plants so don’t leave it out.
How to loosen plant roots safely (video)
Plant the annuals in a prepared space
Place the plant in the prepared hole and cover the roots with loose soil.
Place it in the hole to a depth where the plant will be sitting at the same height it now sits in the pot. For every plant this will be different.
Although this is not a necessity I often replace the removed soil with potting soil to give the plant some extra nutrients especially if I am planting them in a garden area that has not been fertilized for some time or where the soil look less rich or clay-like.
Do not pack the soil in too firmly around the roots – just a light firm touch is enough.
Once the plant is sitting in the ground, at the same height it was at when in its pot, firmly pack soil around it for support.
Water & mulch the replanted annuals
After you have planted the annual in the ground gently water the leaves and soil around it with a spray bottle.
The water will help settle the soil and may uncover some exposed roots which you will need to cover with additional soil.
You can also add a layer of mulch 2″ to 3 ” thick for added protection. You can use store bought mulch, organic mulch or even grass mulch from a lawn mower.
Aftercare Of Your Planted Annuals
Annuals grow really well and really fast. They will bloom throughout the season but this quick growth cycle can cause unwanted consequences.
Annuals can quickly go to seed if left unattended. When they go to seed this is an indication of the end of their life cycle. You don’t want this to happen.
As the plants set seed these seeds begin new growths making your garden look messy.
To avoid this you simply trim the plants of excess growth and also remove the dead blooms.
Simply removing dead blooms and cutting away excess growth will not only prevent new plants from growing and cluttering the area but it will actually encourage the existing plant to produce new flower growths and start the blooming cycle again.
Watering should be your most important aftercare consdieration
Watering is one of the trickiest aspects to growing annuals.
 You don’t want your plant to go thirsty but you don’t want to drown it either.
Watering depends on several different criteria, namely:
- Climate
- Soil Type
- Location
- Types of Annuals
Let’s address each of these in turn.
Climate can affect watering schedule
Annuals require regular watering. however, the amount of watering that your annuals require will very largely depend on the climate of the area in which you live.
If you live in an area where there is very regular rainfall then you will probably not have to water your plants very often unless there is a period of drought or very warm weather.
If you live in very dry areas of the country then you will need to water your plants every day.
The good news is that plants in the ground require less watering than pot plants.
The following rule-of-thumb is a good way to determine how often to water your annuals.
In cooler temperatures:
In cloudy or overcast conditions, and/or high humidity and/or rain you can water your plants less.
Just keep an eye on how moist the soil is and water when it looks like it is drying.
In warmer temperatures:
When there is bright warm sunshine and/or high wind and/or low humidity and/or no rain then water the plants more.
Again, as with cooler temperatures, the soil will be the best indication of whether the plant needs watering or not.
Soil type can also determine how many times you water your annuals
The soil type in your garden greatly affects how often your plants need water.
 As discussed earlier it is fairly easy to manipulate your soil to change its ph value and likewise it is easy to change its overall structure with organic matter such as compost
 and other mulch-type ingredients.
Adding organic compost to the soil not only helps create an environment that is more plant-friendly but it also helps retain moisture and breaks-up clay-type soil for improved aeration and drainage.
Where you planted your annuals will effect their water needs
Just as it is important in real estate it is just as important in gardening – location, location, location.
Generally speaking annuals that are growing in more shaded areas will need less watering than those planted in direct sunlight.
Blocked sunlight will lessen evaporation unless the sunlight is being blocked by other plants or trees that also require water.
If there are other plant growths in the local vicinity of your annuals then they may well be providing shade from the sun thus preventing evaporation but they could also be drinking all the water.
Again the moistness of the soil is a good indication of whether you need to water or not.
The water needs of your annuals will vary with the type of annuals you have planted
Not all annuals are as thirsty as each other.
Before you plant your annuals check the watering requirements of each variety and seriously consider planting them according to their watering needs.
This may seem like a difficult decision to make as most of us want to plant for color co-ordination rather than watering needs.
Luckily though, there are so many varieties of annuals that you won’t have a problem pairing up plants based on color and their watering requirements.
Feeding your planted annuals
Annuals require good fertilization for maximum growth and colorful flowering.
There are specially crafted fertilizers for annuals that offer the best mix of nutrients and ingredients and using these ensures you get a truly vibrant colorful bloom.
A good annual fertilizer will not only help plants grow more colorful displays but they also improve soil conditions, help the plants resist disease and insects and make them more resistant to drought throughout the growing season.
There are even cheap annual fertilizers that include the microorganism archaea that aggressively breaks down organic material in the soil for faster growing results.
[vc_separator]
Hopefully, this article has given you the information you need to plant annuals in the ground regardless of whether you choose to plant from seed, cutting or directly from a pot.
Whichever method you intend to use for growing your annuals you can be assured that if you tend to your plants in the way outlined above you will enjoy the colorful spectacle these beautiful plants display in the summer months.
Thanks for reading! I'm Michael — houseplant fanatic and your Pinterest plant guide.
Follow me on Pinterest for fresh updates 🌿


