Bringing plants into your home is one of the easiest ways to add life, color, and even a touch of nature to your space. But if you’ve ever struggled to keep a houseplant alive (we’ve all been there!), you might be wondering—what’s the secret to growing happy, healthy plants indoors?
The truth is, houseplants aren’t as tricky as they seem. Once you understand the basics—light, water, humidity, soil, and a little bit of TLC—you’ll be well on your way to having a thriving indoor jungle.
In this guide, I’ll walk you through the essentials of indoor plant care, from choosing the right plants for your space to keeping them alive and thriving. Whether you’re a total beginner or looking to level up your plant game, these tips will help you grow with confidence.
Let’s get started!
Table of Contents
- Preparation: Setting Yourself Up for Indoor Plant Success
- Houseplants 101: The Basics
- Houseplant Readiness Checklist: Is Your Space Plant-Friendly?
- Choosing the Right Plant for Your Space
- Bringing Houseplants Home: Tips for a Smooth Start
- Houseplant Maintenance
- Expanding On Your Plant Collection
- Essential Tools & Equipment for Indoor Gardening
- Final Thoughts
Preparation: Setting Yourself Up for Indoor Plant Success
Gardening—whether indoors or out—is all about preparation. Just like you wouldn’t plant a vegetable garden without first tending the soil, successful houseplant care starts with a little planning.
Before you go on a plant-shopping spree (tempting, I know!), it’s important to understand the basics of houseplant care.
Knowing what your plants need will help you create the right environment and set them up to thrive.
Houseplants 101: The Basics
Most plants aren’t too picky about where they grow—as long as the conditions are right. But here’s the catch: “right” looks different for every plant.
Some love bright, direct sunlight, while others prefer low-light corners. Some need constant moisture, while others thrive on neglect.
What is the key to success? Matching the plant to your space, not the other way around.
Before bringing home a new leafy friend, take a moment to evaluate your home’s lighting, humidity, and temperature.
By setting up the right environment from the start, you’ll save yourself (and your plants) a lot of trouble down the road!
1. Finding the Perfect Light for Your Houseplants
Getting the lighting just right is one of the most important (and sometimes trickiest) parts of houseplant care.
Too much direct sun can scorch leaves, while too little light can leave your plants weak and leggy.
Since plants rely on light for photosynthesis—the process that fuels their growth—choosing the right spot makes all the difference.
How Much Light Do Houseplants Really Get Indoors?
It’s easy to assume that a bright room is plenty of light for plants, but indoor lighting is much dimmer than natural sunlight outside. Even a sunny window doesn’t provide the same intensity as direct outdoor light, and the brightness fades quickly as you move farther from the window.
Choosing the Best Window for Your Plants
The direction your windows face plays a big role in how much sunlight your plants receive:
- South-facing windows (in the Northern Hemisphere) get the most direct sun throughout the day. Ideal for sun-loving plants!
- North-facing windows receive the least light and are best for low-light plants.
- East- and west-facing windows provide moderate light, with gentle morning or afternoon sun—perfect for many tropical plants.
2. How to Water Your Houseplants the Right Way
Watering might seem like the easiest part of plant care, but it’s also where most plant parents go wrong.
Overwatering is the number one killer of houseplants—it suffocates roots, encourages rot, and invites fungal diseases.
But don’t worry! Once you understand your plant’s watering needs, you’ll be able to avoid these pitfalls and keep your greenery thriving.
Key Watering Tips to Keep Your Plants Healthy
🌱 Ditch the Watering Schedule – Instead of watering on a fixed schedule, check the soil first.
Stick your finger an inch or two into the soil, or use a wooden chopstick to see if it comes out dry. If the soil is still damp, hold off on watering!
💧 Water Deeply, But Not Too Often – When it’s time to water, give the soil a thorough soak until excess water drains out of the bottom of the pot. This ensures the roots get evenly moistened and flushes out any built-up fertilizer salts or chemicals.
🚰 Always Drain Excess Water – Never let your plant sit in standing water. Empty saucers or cache pots after watering to prevent root rot.
🍂 Watch for Yellowing Leaves – Yellow leaves are often the first sign of overwatering (though other factors can cause this too). If you see yellowing, check your watering habits and adjust as needed.
❄️ Adjust for Seasons – Plants use less water in cooler temperatures and during winter dormancy. Reduce watering in the colder months to avoid waterlogged soil.
Getting watering right is one of the biggest factors in houseplant success.
3. The Secret to Healthy Houseplants: The Right Soil
Did you know that choosing the right soil is just as important as proper watering?
The type of soil you use affects how much water your plant holds onto and how well its roots can breathe.
Using the wrong mix can lead to root rot, poor drainage, and unhappy plants.
What Makes a Great Houseplant Soil?
🌿 Well-Draining is Best – Most houseplants hate sitting in soggy soil. A good mix should drain well while still holding enough moisture for the roots to absorb.
🏝️ Light & Airy is Key – Adding materials like perlite, coarse sand, or orchid bark keeps soil from getting too compacted, ensuring your plant’s roots get the oxygen they need.
🥥 Soilless Mixes for Tropical Plants – Many tropical houseplants (like Monsteras and Philodendrons) thrive in “soilless” mixes made of peat moss, coconut coir, and bark. These hold moisture without becoming too heavy.
Getting your soil mix right makes plant care so much easier—it’s the foundation of a healthy, thriving plant!
4. Keep Your Plants Cozy: The Right Temperature for Houseplants
Most common houseplants are perfectly happy in normal indoor temperatures, but keeping them comfortable goes beyond just setting the thermostat.
🌡️ Avoid Temperature Extremes – A plant sitting too close to a drafty window in winter or near a heater in summer can stress it out and lead to droopy leaves, slow growth, or even leaf drop.
🌬️ Watch Out for Drafts – Cold or hot air from windows, vents, doors, or fans can cause sudden temperature swings that many plants don’t appreciate. Keep them in a stable environment away from strong air currents.
☀️ Windows Can Be Tricky – While natural light is a must, windows can heat up like a greenhouse in summer or get chilly in winter. If your plant sits by a window, monitor its condition and move it back a little if needed.
Each plant has its own temperature preferences, so it’s always a good idea to check what your specific plant needs.
A little extra attention to temperature can go a long way in keeping your houseplants happy and thriving!
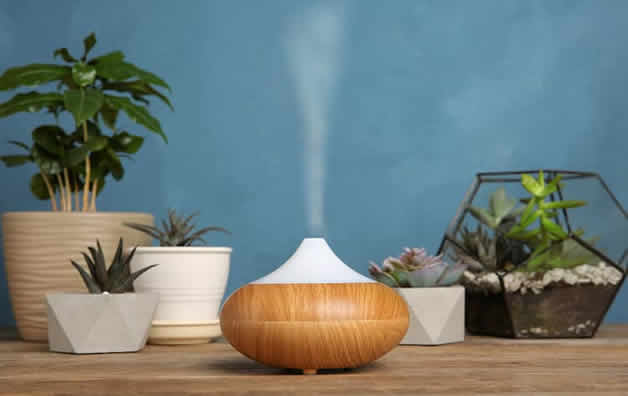
5. Humidity: Does Your Houseplant Need a Moisture Boost?
Most houseplants thrive in humidity levels between 40-60%, but some tropical plants prefer even more moisture in the air.
The tricky part? Our homes tend to be drier than what these plants are used to—especially in winter.
If you live in a humid climate, you might not have to worry. But air conditioning and heating can zap moisture from the air, leaving your plants struggling—especially those with delicate, tropical leaves.
How to Tell If Your Home’s Humidity is Too Low:
🔍 Use a hygrometer (a small, inexpensive gadget) to check your humidity levels.
If they’re below 40%, your plants might need a little extra help.
Easy Ways to Raise Humidity for Your Plants
🌱 Group plants together – As they release moisture through their leaves, they’ll create a more humid microclimate. Just don’t crowd them too much!
💧 Try a pebble tray – Fill a shallow tray with water and pebbles, then place your plant’s pot on top (without letting the roots touch the water). As the water evaporates, it adds humidity around the plant.
🚿 Use naturally humid rooms – Bathrooms, kitchens, and laundry rooms often have higher humidity, making them great spots for moisture-loving plants—as long as they get enough light!
💨 Consider using a humidifier – This is the most effective option, but it does require maintenance and an upfront investment. If you’re new to houseplants, it’s best to start with plants that can handle your home’s natural humidity.
If your plant isn’t thriving and you’ve ruled out lighting or watering issues, boosting humidity could be the secret ingredient it needs!
Houseplant Readiness Checklist: Is Your Space Plant-Friendly?
Before bringing home a new houseplant, take a moment to evaluate your space.
There’s no “wrong” environment—only the need to match the right plant to the right conditions!
🌞 Light Check:
- How much natural light do you have?
- How much window space is available?
- What direction do your windows face? (South-facing gets the most light, while north-facing gets the least.)
💧 Humidity Check:
- What’s the humidity level in your home? (Tip: A hygrometer can help!)
- Does your space tend to get extra dry in winter?
🌡 Temperature Check:
- What’s the average temperature range?
- Are there seasonal changes to consider?
- Is the space exposed to drafts, heaters, or AC vents?
🚪 Traffic & Accessibility:
- Will your plant be in a prominent area where you’ll remember to care for it?
- Is the location low-traffic, or is the plant likely to be bumped or brushed against?
- Is it easy to access for watering and maintenance?
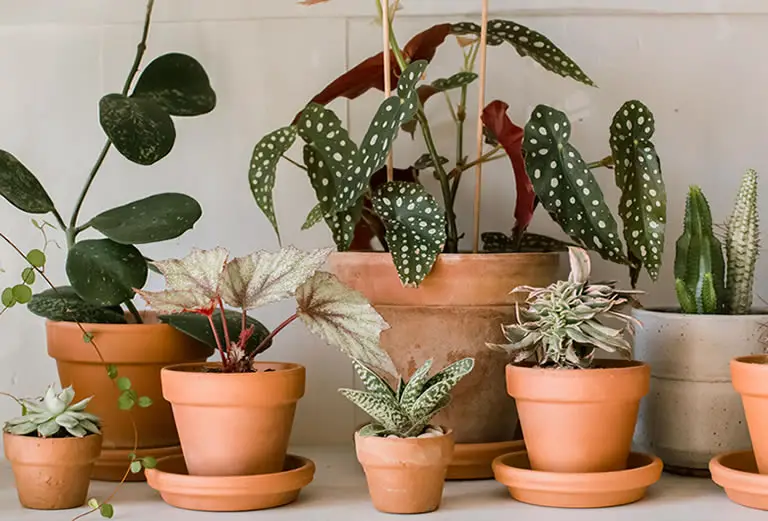
Choosing the Right Plant for Your Space
Once you know your home’s natural conditions, picking a plant that thrives in those conditions will make plant care much easier!
Start with low-maintenance options that suit your environment, and as you gain confidence, you can branch out into more challenging plants.
A happy plant = a happy plant parent!
Best Beginner Houseplants: Foolproof Favorites for New Plant Parents
If you’re new to houseplants, start with these tried-and-true superstars. They’re forgiving, adaptable, and nearly impossible to kill—perfect for building confidence!
1. ZZ Plant (Zamioculcas zamiifolia)
Tough as nails – this glossy, evergreen beauty thrives on neglect.
It tolerates low light, irregular watering, and general forgetfulness.
The only downside? It’s so easy you might not feel challenged—but it’s a great confidence booster!
See our range of ZZ plant articles.
2. Peace Lily (Spathiphyllum)
A moisture-loving beauty that tells you when it’s thirsty—it wilts when dry but perks up quickly after watering.
Perfect for those who tend to overwater!
Plus, it rewards you with elegant white blooms.
3. Snake Plant (Sansevieria)
The king of set-and-forget plants!
This sculptural succulent tolerates low light, infrequent watering, and neglect.
With many stunning varieties to choose from, it’s perfect for any home.
Check out our range of snake plant articles.
4. Cacti & Succulents
Minimal care, maximum style. These sun-loving plants store water in their thick leaves, making them ultra-low maintenance.
The biggest beginner mistake? Overwatering!
Let them dry out between waterings.
Be sure to read our succulent articles for care tips and ideas for which succulents are the best for your home.
5. Aloe Vera
A timeless classic with medicinal benefits!
Aloe loves bright light and well-draining soil.
Treat its soothing gel as a natural remedy for burns or skin irritation.
Bonus: It can live for generations!
We have a wide range of articles about aloe and aloe vera.
6. Pothos & Heartleaf Philodendron
Lush, trailing vines that thrive in low light and bounce back from neglect.
Pothos has many beautiful varieties, while the variegated Philodendron Brasil is a standout.
7. Peperomia
A compact, charming plant with dozens of varieties!
Some have thick, succulent-like leaves that store water, making them super low-maintenance.
Watermelon Peperomia is an especially easy-care favorite.
You may be interested in our guide to growing pothos faster.
Read our guide to peperomia care.
Start Simple & Grow Your Green Thumb!
This list is just the beginning—many hardy houseplants can handle a few beginner mistakes.
Once you gain confidence, you can explore more demanding varieties.
Which of these beginner plants is your favorite? Let me know!
Bringing Houseplants Home: Tips for a Smooth Start
After selecting the perfect spot for your new plant and considering the conditions it needs to thrive, it’s time to choose your plant!
While availability may vary, most of the plants I’ve recommended can be found at your local garden center or even your nearest grocery store.
What to Look for When Purchasing Healthy Plants
When choosing a plant, quality matters!
A healthy plant is your best start for thriving greenery.
Here’s what to check for:
- Healthy leaves: Look for leaves that are vibrant in color, without any signs of yellowing, browning, or damage.
- Full, sturdy growth: Avoid leggy plants with weak stems; go for a full and compact plant that looks robust.
- No signs of pests: Check for insects around the plant’s joints and under the leaves.
- Soil condition: Steer clear of plants with mold or mildew on the soil or leaves, as these indicate overly damp conditions.
If you’re unsure about a plant’s condition, don’t hesitate to ask store staff for help!
Ordering Plants Online
Online shopping for plants has become incredibly popular, and many sellers offer healthy, well-shipped houseplants.
Etsy is one of my go-to places for plant shopping.
When your new plant arrives, give it some time to acclimate after its journey.
Here’s what you should do:
- Leave it undisturbed: Avoid repotting, fertilizing, or excessive handling. Your plant needs quiet time to adjust to its new home.
- Water only if needed: Check the soil—if it’s dry, give it a gentle drink.
- Let it rest: Allow your new plant to recover from its “trip” before making any changes.
Allow Time for Acclimation
It’s completely normal for a plant to experience a period of adjustment when brought into a new home.
During this time, your plant may pause its growth and even lose a few leaves.
Don’t worry—this is just part of the acclimation process. The key is patience.
Avoid Repotting Too Soon
Many new plant owners are eager to repot their plants into what they believe is better soil as soon as they get home.
However, repotting too soon can do more harm than good. It’s an invasive process that can stress out a plant during its adjustment phase.
General rule: Wait at least two months before repotting a new plant.
The best time to repot is during the spring or early summer, when the plant is more likely to be in an active growing phase.
Houseplant Maintenance
Once you’ve chosen the right spot and are following the watering guidelines specific to your plant, things should be relatively smooth from here.
The key is to observe and enjoy the process.
Patience is a Gardening Virtue
Your plant will eventually begin to grow again, whether it’s through a new leaf bud or a tiny leaf spear.
Some beginner plants adapt quickly, so you might not notice the growth right away.
For others, it can take much longer to feel truly comfortable in their new home.
Once your plant is settled and actively growing, you’ll likely have a few maintenance tasks to manage.
Now’s the time to designate a spot for your gardening tools.
While a bottle of fertilizer under the sink may suffice temporarily, tool sheds exist for a reason!
Flush the Soil When Watering
A great way to water most plants is to thoroughly soak the pot.
Flushing the soil helps remove residual fertilizers, toxins, and other buildup, while ensuring the entire root system is hydrated.
Make sure your plant is in well-draining soil for this process to work effectively.
Otherwise, water may pool at the bottom, leading to root rot.
Note: Soil made from peat or sphagnum moss can be difficult to rehydrate when dry.
You might need to soak the soil for longer to ensure full hydration.
And don’t forget: If your plant’s pot sits on a saucer or cache, always empty it after the water drains through.
Grooming and Pruning
Grooming your houseplants is an essential part of maintenance.
It involves removing dead, damaged, or unsightly plant material, which not only improves the plant’s appearance but also prevents pests and pathogens from finding hiding spots.
To prune a yellowing leaf, gently tug on it. If it falls off easily, you can remove it.
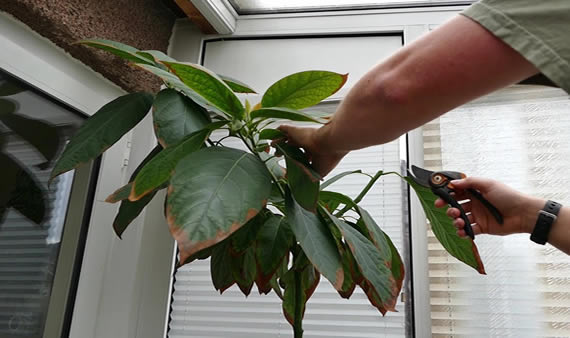
If not, cut it cleanly with sterile tools. Always sterilize your cutting tools before use—wipe them with isopropyl (rubbing) alcohol or use another sterilizing method to avoid transferring harmful microbes.
For some plants, pruning encourages more branching and a fuller, compact shape.
However, not all plants respond in the same way, so be sure to research the specific needs of your species.
Pro Tip: You can trim brown areas on leaves for a cleaner look, but be sure to stay within the brown margin to avoid cutting into the living tissue of the leaf.
Read this article to see how pruning can increase the growth rate of an indoor plant.
Houseplant Fertilization
When it comes to fertilizing houseplants, less is more.
Over-fertilizing can damage the roots, discolor the leaves, and stunt growth.
Since plants primarily get their food from light, they don’t need a lot of extra nutrients.
Here are some tips for proper fertilization:
- Dilute the fertilizer to half or even a quarter of the recommended strength on the label.
- Fertilize only during the warm growing season, when the plant is actively growing.
- For dry fertilizer blends, always dissolve them in water first for easier and more even application.
Many nurseries add slow-release fertilizer pellets to the soil, so be mindful of the nutrients already present. These pellets take time to break down, so avoid over-fertilizing until they are used up.
Personally, I prefer a good quality liquid fertilizer as you can control the strength of the feed and have more control over when you give it to your plants. A soluble fertilizer also works very well for the same reasons.
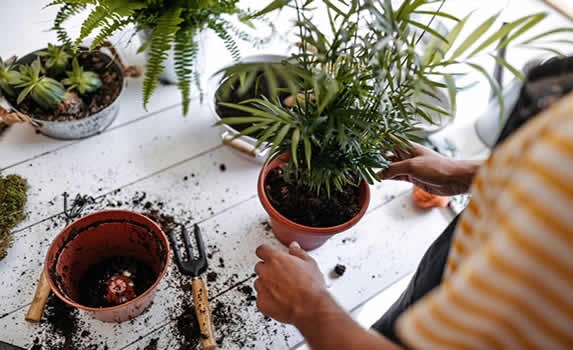
Repotting
Repotting is a delicate process for houseplants. Though it may seem like a simple refresh, it can actually be quite traumatic for the plant.
Even careful repotting can cause stress by tearing delicate roots. In fact, pruning is often less stressful for plants than moving them to a new pot.
Fortunately, most plants don’t need frequent repotting.
Many can grow happily in their original nursery pots for years.
Here’s when and how to repot
-
-
- Signs it’s time to repot:
- Increased watering frequency (the roots have filled the pot).
- Roots pushing through the drainage holes or outgrowing the pot.
- Lackluster or stunted growth.
- Best time to repot: Spring or early summer, when the plant is actively growing and has time to recover.
- Pot size: Choose a pot only one to two inches larger in diameter than the current one. A larger pot can lead to overwatering issues.
- Drainage: Ensure the new pot has proper drainage holes—pebbles at the bottom of a pot don’t work as well.
- Pot material: Terra cotta pots dry out faster and allow roots to breathe, while plastic containers retain more moisture.
- Signs it’s time to repot:
-
Repotting can be stressful for the plant, so avoid doing it unless it’s necessary.
Pests and Disease
No plant is immune to pests, but some are more resistant than others.
Common invaders include aphids, scale, spider mites, thrips, and whiteflies.
Preventing Pests
- Healthy plants are less susceptible: Regularly check for pests, especially when watering.
- Signs of pest problems: Look for discolored or deformed leaves. Sucking insects like aphids excrete sticky “honeydew,” which may attract ants. You may also notice tiny webs from spider mites.
- Small pests: Some pests are tiny and difficult to see with the naked eye. A magnifying glass can be helpful for spotting them.
Treatment Tips:
- Catch infestations early: The sooner you spot the problem, the easier it is to manage.
- Repeated treatments: You may need to repeat treatments every 4-6 days until the infestation is cleared.
- Isolation: Isolate the infested plant immediately to prevent spreading to others.
- Remove affected leaves: Safely discard damaged leaves (don’t compost them) to help reduce the pest population.
Natural Pest Treatments
- Neem oil
- Insecticidal soap
- Diluted alcohol spray – use rubbing alcohol and dilute it.
- Diatomaceous earth (DE) – it must be food grade, like this one.
All the above are mild, organic treatments that are safe for houseplants.
By monitoring your plants regularly and treating any issues early, you can help your plants thrive free of pests.
A Weekly Clean
While not strictly necessary, a weekly shower is a routine many experienced plant growers swear by.
It helps keep your plants clean, shiny, and healthy.

Washing your plant’s leaves removes dirt, grime, and potential pests, especially spider mites, which prefer dry conditions.
- How to Shower Your Plant:
- Wait until it needs water: Don’t shower your plant right after it’s been watered, as you don’t want to re-wet the soil.
- Use a sink or bathtub: Gently bring your plant into a sink or bathtub and give the leaves a good wash with lukewarm water.
- Wrap the pot (optional): If you don’t want to soak the soil, you can wrap the pot to prevent excess water from reaching the soil.
- Large plants: If your plant is too big for the sink or bathtub, consider moving it outside and gently hosing it down.
Not only will your plant look great after a shower, but it will also benefit from cleaner leaves that can “breathe” better and more easily absorb light.
It’s a simple yet effective part of your plant care routine.
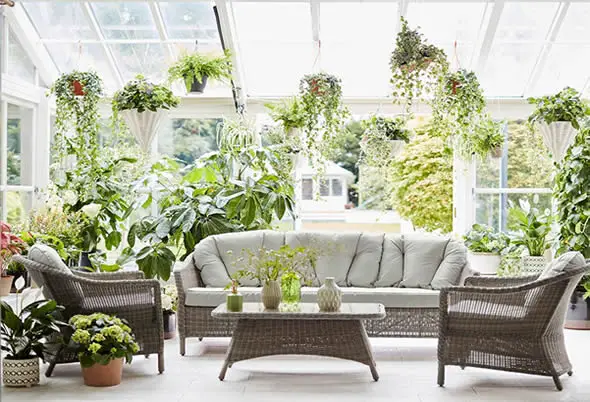
Expanding On Your Plant Collection
If you’ve enjoyed caring for your plants so far, it’s likely you’ll want to expand your collection.
There’s a whole world of houseplants to explore, each with unique characteristics and beauty.
As you grow your plant family, here are some exciting adventures to consider:
Your Future Indoor Garden
As you continue your houseplant journey, you may find that your indoor space transforms into a vibrant, lush garden.
Here are some ways to enhance and expand your indoor garden while keeping it thriving:
Houseplant Propagation
One of the most fun and rewarding aspects of houseplant care is propagation—the process of making new plants!
You can propagate plants through sexual reproduction (pollinated seeds) or asexual reproduction, such as:
- Offsets (baby plants growing from the base of the parent plant)
- Leaf or stem cuttings
- Air layering
- Root division
Not all plants can be propagated in every way, so it’s important to research the best method for each species.
Propagating plants is a fulfilling way to share the joy of houseplant care and even expand your own collection!
We have a wide range of articles on plant propagation from dividing aloe plants and propagating snake plants and propagating succulents to propagating ZZ plants and much more.
Experiment with New Plants
Once you’re comfortable with your existing plants, don’t hesitate to try new species.
Explore different types of foliage, flowers, or even edibles that can thrive indoors.
From air plants to exotic tropicals, there’s an abundance of possibilities to add variety and charm to your collection.
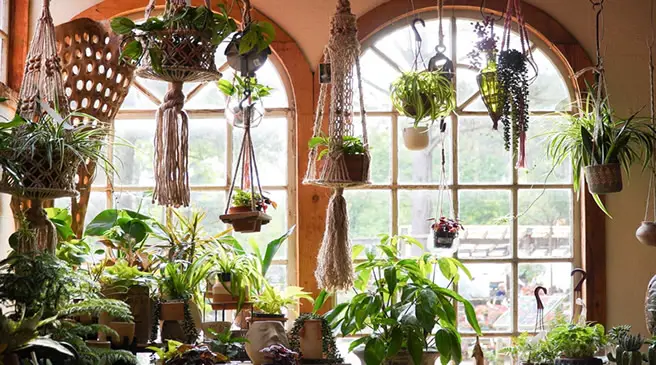
Consider Plant Arrangements
Think about how to arrange your plants for maximum aesthetic and functional impact.
Some plants thrive in clusters, while others make great standalone statement pieces.
Grouping plants by light and humidity preferences can also help simplify care.
- Statement plants: Large leafy plants like the Fiddle Leaf Fig or Bird of Paradise make bold statements in a room.
- Trailing plants: Pothos or English Ivy can add a beautiful cascade of greenery, perfect for hanging baskets or high shelves.
Create a Plant Shelf or Green Wall
If you have limited floor space, consider creating a vertical garden or plant shelf to display your plants.
A plant wall can be a striking feature in your living room, while a shelving unit or plant stand adds character and organization.
Grow Edible Plants
Many indoor plants aren’t just for decoration—they can be edible too!
Consider growing herbs like basil, mint, or rosemary on your windowsill, or even small vegetables like cherry tomatoes or lettuce.
Indoor vegetable gardening can be an incredibly rewarding way to nurture your garden.
Learn and Adapt
Your indoor garden will evolve as you learn more about your plants.
Pay attention to their growth patterns, needs, and how they respond to seasonal changes.
With every new plant, you’ll grow as a gardener and create a space that’s uniquely yours.
As you continue to nurture your indoor garden, you may find yourself exploring a wide range of gardening tools and equipment to make the experience even more enjoyable and rewarding.
While many of these items are optional, they can certainly elevate your plant care and open up new possibilities.
Essential Tools & Equipment for Indoor Gardening
Below are a few common items you might consider adding to your gardening toolkit.
Pots & Planters
You can never have too many pots!
Choose the right size and material to suit your plants’ needs.
Options include ceramic, plastic, terra cotta, or even self-watering pots. Don’t forget to make sure they have drainage holes!
Soil & Amendments
High-quality soil is crucial for plant health.
Depending on the plant type, you might need special soils (e.g., cactus soil, orchid bark, or succulent mix).
Amendments like perlite, vermiculite, or coconut coir can help improve drainage and moisture retention.
Cutting Tools
A good pair of pruning shears, scissors, or a sharp knife will come in handy for trimming, pruning, and propagating plants.
Keep them clean and sterilized to prevent introducing diseases.
Fertilizers
While houseplants can thrive with minimal feeding, occasional fertilizing can boost their growth.
Liquid, slow-release, or organic fertilizers are great choices to provide the nutrients your plants need.
Pest Treatments
Whether it’s neem oil, insecticidal soap, or diatomaceous earth, having pest control on hand can save your plants from common houseplant pests. Prevention is often the key, so regular checks and gentle treatments can keep infestations in check.
Extra Tools for Enthusiasts
Grow Lights
For low-light spaces or winter months, grow lights can help provide the light that your plants need to thrive.
LED or fluorescent lights are energy-efficient options that mimic natural sunlight.
Humidifiers
If you live in a dry climate , especially during winter, or have a plants that require higher humidity levels than are comfortable for you in your home, a humidifier can help increase the moisture in the air and create a better environment for tropical plants.
Propagation Equipment
If you’re into propagating plants, you may want to invest in propagation stations, rooting hormone, or even a humidity dome to give your cuttings the best start.
Mini Greenhouses
For those who have a lot of space or want to grow a wider variety of plants, a small indoor greenhouse can provide an ideal environment for certain plants to flourish.
This is especially true for those plants that require higher humidity or specific temperatures.
Final Thoughts
A flourishing indoor garden is not only a beautiful addition to your home, but also an ongoing source of joy and accomplishment.
Your plants will continue to grow and adapt, and in turn, you’ll expand your knowledge and connection with nature.
As you embark on this green journey, remember that patience and observation are key.
Embrace the process and watch your indoor garden thrive!