If you’re looking for a houseplant that makes a bold statement, the Rubber Plant (Ficus elastica)—also known as the Indian Rubber Tree—is an excellent choice. With its striking foliage and ease of care, this plant is perfect for beginners or anyone who considers themselves to have a “black thumb.”
Table of Contents
- How to Care for a Rubber Plant (Ficus elastica)
- Additional Care Tips
Quick-View Care Guide for Rubber Plants
To keep your Rubber Plant thriving, follow these essential care tips:
- Soil: Use a well-draining potting mix.
- Humidity: Maintain moderate humidity levels.
- Temperature: Keep it between 50°F (10°C) to 85°F (29°C).
- Watering: Water when the top inch of soil is dry.
- Fertilizing: Feed your plant once a month with a balanced fertilizer.
With the right care, your Rubber Plant can grow into a stunning houseplant that enhances your space for years to come.
Keep reading as we break down everything you need to know about growing, maintaining, and troubleshooting common issues with this resilient indoor plant!
How to Care for a Rubber Plant (Ficus elastica)
If you’re looking for a low-maintenance houseplant that makes a bold statement, the Rubber Plant (Ficus elastica) is a great choice.
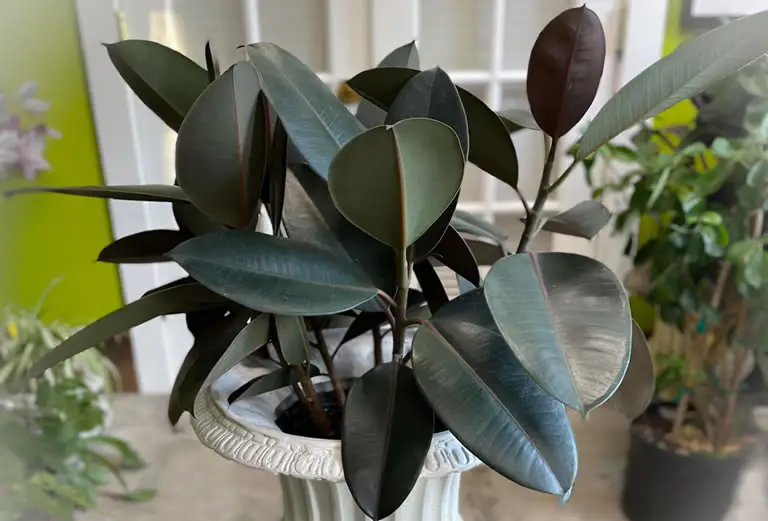
Part of the massive Ficus family—home to nearly 900 species of trees, vines, and shrubs—this plant has several stunning varieties, each with its own unique foliage.
Meet the Rubber Plant
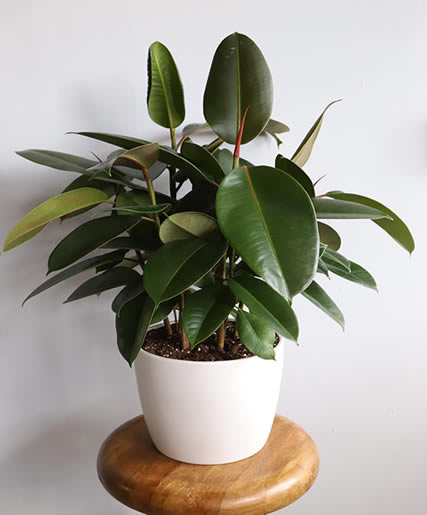
Rubber Plants are broadleaf evergreens known for their large, thick, and glossy leaves.
Native to Himalayas, Sumatra, Malaysia, and Java, they’ve become popular worldwide thanks to their resilience and adaptability.
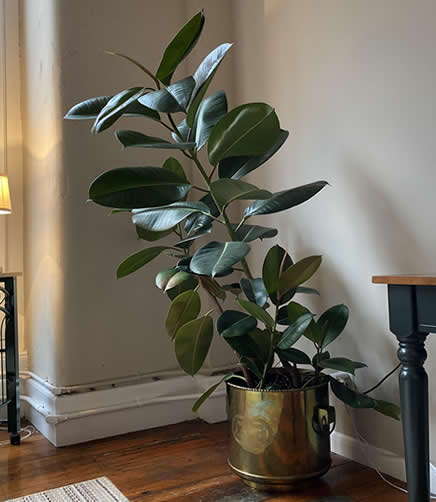
In warm, frost-free climates, they can grow outdoors, reaching towering heights of 100 feet!
But don’t worry—when kept indoors, they typically max out around 10 feet tall, making them a striking yet manageable houseplant.
Why You’ll Love a Rubber Plant
With its glossy, leathery leaves, the Rubber Plant is a real eye-catcher.
The classic variety has deep green leaves, but if you’re after something with a little more flair, check out these stunning cultivars:
- ‘Decora’ – Deep green leaves with a bold white midrib.
- ‘Rubra’ – Dark green foliage accented by a rich red midrib.
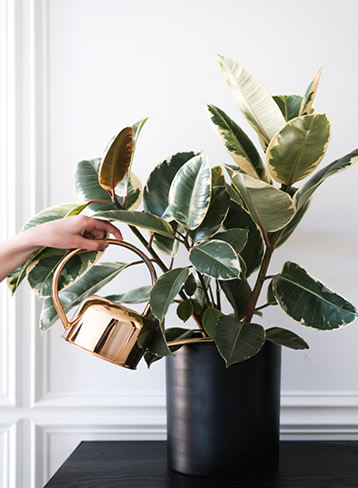
- ‘Tricolor’ – A mix of green, pink, and cream tones.
- ‘Robusta’ – Extra-large green leaves, up to 18 inches long!
- ‘Doescheri’ – Soft gray and cream variegation with pink veins.
- ‘Variegata’ – Compact, with yellow-and-green variegated leaves.
- ‘Foliis Aureo-marginata’ – Edged in golden yellow for a striking effect.
Growing a Thriving Rubber Plant
With the right care, your Rubber Plant will thrive for years, adding a lush, tropical feel to your space.
Even if you don’t consider yourself a “plant person,” this one is hard to kill! Below, we’ll cover everything you need to know—from watering and lighting to common problems and how to prevent them.
Keep reading to learn how to make your Rubber Plant happy, healthy, and absolutely stunning!
1. The Best Soil for Your Rubber Plant
Rubber Plants are fairly adaptable when it comes to soil, but since you’re growing yours in a container, it’s best to give it the ideal foundation for healthy growth.
The key? Good drainage and fertility.
Regular potting soil alone tends to be too dense and retains too much moisture, which can lead to root rot—something you definitely want to avoid.
Instead, try one of these better options:
- Mix it up – Combine half potting soil with peat or another light mix to improve drainage.
- Use a well-draining potting mix – Many commercial mixes are designed to drain well and often include slow-release fertilizers, which can be a bonus if you forget to fertilize regularly.
- DIY your own mix – A blend of peat, pine bark, and coarse sand (in equal parts) creates a light, airy soil that keeps roots happy.
No matter which route you take, the two most important things are:
Fertility – Your Rubber Plant needs nutrients to thrive.
Drainage – Too much moisture = trouble!
2. Light Requirements for a Healthy Rubber Plant
When it comes to lighting, the amount your Rubber Plant needs depends on whether it has solid green or variegated leaves:
🌱 Green-leafed varieties – More adaptable! They thrive in bright, indirect light but can also handle lower light conditions indoors.
🌿 Variegated varieties – Need brighter light to maintain their stunning leaf patterns. If they don’t get enough light, their colors can fade, making them look more like their green cousins.
⚠️ A Few Light Warnings:
- Avoid direct sunlight! Too much can burn the leaves.
- Not enough light? Your plant might become leggy and spindly. Move it to a spot with a bit more brightness to encourage healthy growth.
Would you like to give your Rubber Plant a summer vacation outdoors? Great idea! Just be sure to place it in partial sun or partial shade—too much sun can scorch the leaves.
With the right soil and light, your Rubber Plant will be thriving in no time!
4. The Best Temperature for a Happy Rubber Plant
Rubber Plants come from warm, tropical regions, so they’re not fans of cold weather. To keep yours healthy and thriving, aim for indoor temperatures between 50°F (10°C) and 85°F (29°C).
While they can tolerate temperatures as low as 39°F (4°C), it’s best to keep them in a comfortable, consistent environment.
A simple rule of thumb: 👉 If you’re comfortable, your Rubber Plant is comfortable too!
If you like to move your Rubber Plant outdoors in warm months, just be sure to bring it back inside before temperatures drop in the fall.
A sudden cold snap or frost can damage the leaves—or worse, kill the plant altogether.
5. How to Water Your Rubber Plant the Right Way
Watering a Rubber Plant isn’t complicated, but it does need to be done right to avoid problems like root rot or yellowing leaves.
Here’s how to get it just right:
💦 Deep, Thorough Watering is Key
When you water, soak the roots completely until you see water draining from the bottom of the pot.
But don’t let the plant sit in standing water! After 30 minutes, empty the saucer to prevent soggy soil.
How Often Should You Water?
Spring & Summer (Growing Season): Usually once a week is enough.
Fall & Winter (Dormant Season): Growth slows down, so you’ll likely only need to water every other week.
🖐 Quick Watering Test:
👉 Stick your finger into the soil. If the top inch feels dry, it’s time to water!
🚰 Pro Tip:
Use room temperature water that’s been sitting out overnight (or rainwater, if you have it).
⚠️ Does The Rubber Plant Have Yellow Leaves?
If your Rubber Plant’s leaves start turning yellow, it might not be getting enough water.
Check the soil and adjust your watering routine accordingly!
With the right temperature and watering routine, your Rubber Plant will stay happy, healthy, and thriving for years to come!
6. Keeping Your Rubber Plant’s Humidity Just Right
Rubber Plants thrive in humid environments, just like their natural tropical habitat.
If the air in your home is too dry, your plant may struggle to grow properly or develop crispy leaves.
But don’t worry—raising humidity is simple!
How to Increase Humidity for Your Rubber Plant
✅ Mist the Leaves: Fill a spray bottle with water and mist the foliage several times a week (or even daily). You really can’t overdo it!
✅ Use a Pebble Tray: Place small pebbles in a tray, add water, and set your plant’s pot on top. As the water evaporates, it boosts humidity around your Rubber Plant.
✅ Put It in a Humid Room: If you have a bright bathroom, that’s a perfect spot! The steam from showers naturally keeps the air moist.
✅ Try a Humidifier: If you want to make things even easier, a small room humidifier near your plant works wonders.
🚫 Avoid placing your Rubber Plant near heating vents, air conditioners, or drafts—these dry out the air and can cause leaf damage.
7. Feeding Your Rubber Plant: The Right Way to Fertilize
Rubber Plants aren’t heavy feeders, but a little fertilizer goes a long way in keeping their big, glossy leaves vibrant.
Here’s what you need to know:
📅 When to Fertilize
✔️ Only fertilize during the growing season (spring & summer).
✔️ Skip fertilizing in fall & winter when the plant goes dormant and stops growing.
🧪 Best Fertilizer Options
✔️ Slow-Release Granules: Sprinkle on top of the soil, and they release nutrients over 2-3 months (perfect for low-maintenance care!).
✔️ Water-Soluble Houseplant Fertilizer: Mix at half-strength and apply once a month when you water.
✔️ Balanced Indoor/Outdoor Fertilizer: Works too—just dilute to half-strength before applying.
This Fiddle leaf fig plant care kit works well with rubber plants.
Preventing Fertilizer Buildup (Salt Flush)
Over time, fertilizer salts can build up in the soil, leading to leaf burn or other issues.
Flushing the soil every few months helps prevent this:
1️⃣ Take your Rubber Plant to the sink, bathtub, or outdoors.
2️⃣ Slowly run water through the soil for about 5 minutes to wash away excess salts.
3️⃣ Let the pot drain completely before putting it back in its spot.
With the right humidity and feeding routine, your Rubber Plant will stay healthy, lush, and thriving for years to come!
Additional Care Tips
Now that you know the basic care requirements for your rubber plant let’s dive a little deeper.
Below are some helpful tips for ensuring you keep your rubber plant thriving for years.
Pruning Your Rubber Plant: Keeping It Healthy & Tidy
Pruning a Rubber Plant isn’t just about keeping its size in check—it also helps it grow fuller and healthier.
But before you grab your pruners, there are a few things to keep in mind!
Handling the Sticky Sap
When cut, Rubber Plants release a milky white sap that can irritate your skin and eyes.
If you’re unsure how your skin will react, wear gardening gloves while pruning.
Be extra careful not to touch your face or eyes after handling the plant.
When & How to Prune
✅ Small Plants? No Need to Prune Yet! If your Rubber Plant is still under a few feet tall, you can let it grow freely.
✅ Control Height by Cutting the Top: Once it reaches your desired height, trim off the top branches with sharp hand pruners (or loppers for thicker stems).
✅ Encourage a Bushier Look: Want a fuller plant? Prune the side branches—each cut will encourage multiple new branches to grow!
🛑 Avoid pruning in winter since the plant is dormant. The best time to prune is spring or summer, but shaping cuts can be made any time of year.
Keep Your Tools Clean
To prevent spreading diseases or pests, always clean your pruning tools before and after use.
A simple wipe with rubbing alcohol or disinfectant will do the trick!
Potting & Repotting Your Rubber Plant: A Simple Guide
Rubber Plants are pretty low-maintenance when it comes to potting, but repotting at the right time ensures healthy growth.
Whether you’re bringing one home for the first time or refreshing an older plant, here’s what you need to know!
How Often Should You Repot?
Your Rubber Plant will be happy in a 3-gallon pot for a few years before needing a new home.
But if you’ve just picked one up from the garden center and it’s still in a 1-gallon container, it might be best to repot sooner rather than later—especially if it’s looking top-heavy.
✅ Repot only when needed—every few years is fine.
✅ Use a slightly larger pot (not too big, or the soil will stay too wet).
✅ Watch for root overgrowth—if roots start coming out of the drainage holes, it’s time to move up a size.
Choosing the Right Pot
Your Rubber Plant isn’t picky, but it does need a pot with drainage holes to prevent root rot.
I like white 10″ pots, like this one, for my indoor rubber plants
If you love decorative pots without drainage, no worries—just set the draining pot inside and empty any excess water after watering.
If you’re looking for low-maintenance options, self-watering planters can work well for Rubber Plants.
They help regulate moisture, so you don’t have to water as frequently.
How to Repot Your Rubber Plant
1️⃣ Gently remove the plant from its current pot. If the roots are tightly wrapped, loosen them carefully to encourage healthy growth.
2️⃣ Fill the new pot about ¼ of the way with a rich, well-draining soil mix.
3️⃣ Place your Rubber Plant inside—make sure it sits at the same depth as in its original pot.
4️⃣ Fill in with soil, gently firming it around the base (but don’t pack it too tightly).
5️⃣ Water thoroughly until moisture drains from the bottom holes.
6️⃣ Position in bright, indirect light—and let it settle in!
A well-draining soil mix and the right-sized pot will keep your Rubber Plant happy and growing strong.
Plus, choosing a stylish planter makes it a real statement piece in your home!
Propagating Your Rubber Plant: A Simple Step-By-Step Guide
Want to grow more Rubber Plants from your existing one?
Propagation is a fun and easy way to create new plants for free—even if you’re a beginner!
Just follow these steps, and soon you’ll have baby Rubber Plants ready to grow.
When to Propagate
The best time to propagate a Rubber Plant is during its active growing season—spring and summer.
This gives the cutting plenty of time to establish strong roots before winter.
How to Propagate a Rubber Plant
🔪 Step 1: Take a Cutting
Use clean pruning shears to snip off a 4- to 6-inch stem from the tip of a healthy branch.
Remove all but the top one or two leaves—this helps the cutting focus on root growth instead of supporting extra foliage.
🩹 Step 2: Let It Rest
The cutting will release milky sap when cut.
Let it sit for 30 minutes so the sap seals over.
🪴 Step 3: Prepare the Pot
Fill a 6-inch to 1-gallon pot with a light, well-draining potting mix or seed-starting soil.
Water the soil before planting to help it settle.
Use your finger to make a small hole in the center for the cutting.
🌿 Step 4: Plant the Cutting
Dip the cut end of the stem in rooting hormone (optional, but it speeds up root growth).
Place the cutting into the hole and gently firm the soil around it.
Water the soil again until moisture drains from the bottom holes.
☀️ Step 5: Find the Right Spot
Place your cutting in bright, indirect sunlight.
Keep the soil consistently moist (but not soggy) while roots develop.
How Long Does It Take to Root?
✅ 4-6 weeks: The cutting will start developing roots.
✅ 3-4 months: It should have a strong root system—test by gently tugging it. If it resists, roots have formed!
Once the new plant is established, continue caring for it like a mature Rubber Plant—and enjoy watching it grow!
Common Pests & Diseases Affecting Rubber Plants
Rubber Plants are generally low-maintenance and resilient, but they aren’t completely immune to pests and diseases.
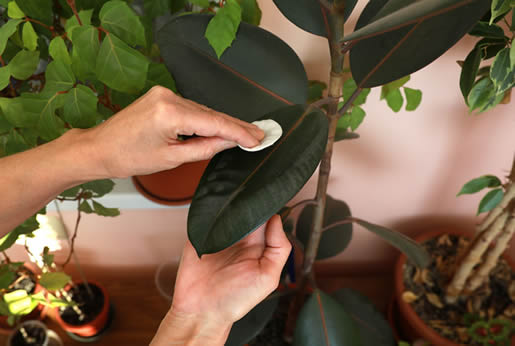
Be sure to wipe your rubber plant leaves occasionally as this will help keep them clear of pests.
Knowing what to look for can help you catch problems early and keep your plant thriving!
1. Root Rot
Cause: Overwatering, poor drainage, or using a pot that’s too large.
Symptoms:
✔️ Leaves turning black
✔️ Sudden wilting or drooping
✔️ Mushy roots
Solution:
✅ Remove the plant from its pot and inspect the roots
✅ Use sterilized pruning shears to cut away damaged or rotting roots
✅ Repot in fresh, well-draining soil
✅ Water only when the top inch of soil is dry
2. Spider Mites
Cause: Dry indoor air and lack of humidity.
Symptoms:
✔️ Fine webbing on leaves
✔️ Tiny pinhead-sized mites
✔️ Leaves turning yellow or speckled
Solution:
✅ Increase humidity (mist leaves, use a pebble tray, or run a humidifier)
✅ Spray with insecticidal soap or Neem oil (coat both sides of leaves)
✅ Wipe leaves regularly with a damp cloth to prevent infestations
3. Mealybugs
Cause: These sap-sucking insects love warm, humid environments.
Symptoms:
✔️ Cotton-like clusters on leaves and stems
✔️ Leaves turning yellow or distorted
✔️ Sticky residue (honeydew) on the plant
Solution:
✅ Use a cotton swab dipped in rubbing alcohol to remove clusters
✅ Spray with Neem oil or insecticidal soap
✅ Repeat treatment every few days until pests are gone
Final Tips for a Pest & Disease-Free Rubber Plant:
✔️ Avoid overwatering—this is the #1 cause of disease
✔️ Wipe leaves regularly to prevent pests
✔️ Increase humidity to keep spider mites away
✔️ Inspect new plants before bringing them home to prevent infestations
By staying proactive, your Rubber Plant will remain healthy, vibrant, and pest-free!