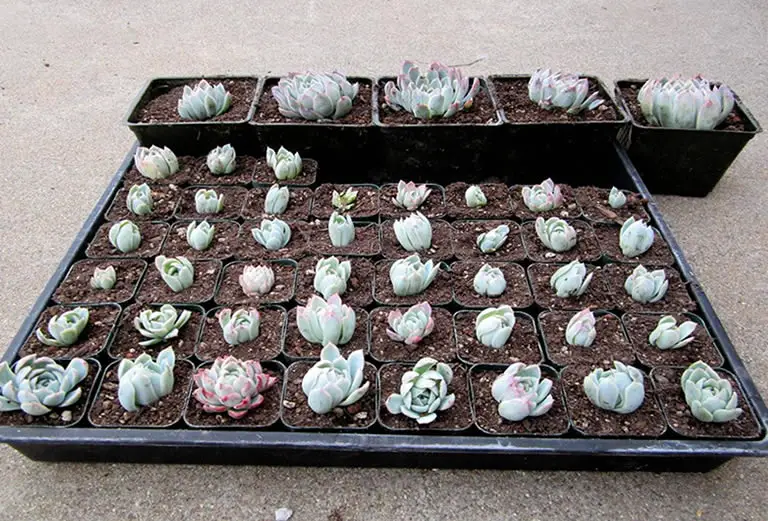
There’s something magical about propagation—watching a single leaf or baby rosette grow into a whole new plant feels like a little miracle. And if there’s one plant that makes this process both satisfying and beginner-friendly, it’s the Echeveria.
With their compact rosettes and fat, water-storing leaves, Echeverias are among the easiest succulents to propagate. Whether you’re looking to expand your own collection or create cute gifts for friends, you’ll be thrilled by how simple (and fun!) it is to multiply these beauties.
Here’s your go-to guide for propagating Echeveria like a pro—indoors or out.
Table of Contents
- When Is the Best Time to Propagate Echeveria?
- 1. Propagating from Leaves: Nature’s Cheat Code
- 2. Propagating from Offsets (a.k.a. Chicks)
- 3. Propagating from Stem Cuttings: Great for Leggy Plants
- 4. Can You Propagate Echeveria in Water?
- How Long Does Propagation Take?
- Lighting and Conditions for Best Results
- Propagating Echeveria Outdoors: Let Nature Do the Work
- How to Care for Newly Propagated Plants
- Common Mistakes to Avoid
- Propagation Wrap-Up
When Is the Best Time to Propagate Echeveria?
Spring through early summer is prime time.
That’s when your plant is actively growing and will bounce back fastest from propagation.
While you can propagate in fall or winter, growth is slower and success rates may dip due to cooler temps and lower light.
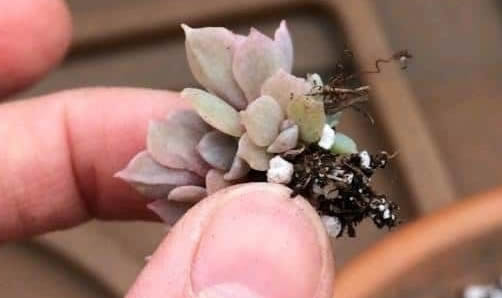
1. Propagating from Leaves: Nature’s Cheat Code
Leaf propagation is a fan favorite because it feels a little like magic. All you need is a healthy leaf and a bit of patience.
Here’s how to do it:
- Gently twist off a full, healthy leaf from the stem. Don’t just pluck—make sure the entire base comes off cleanly.
- Let the leaf dry for 2–5 days until the end callouses over. This helps prevent rot.
- Place the leaf flat on top of dry, well-draining soil. Don’t bury it.
- Keep the setup in bright, indirect light. Mist lightly every few days—but don’t soak!
- Within a few weeks, tiny roots and a baby rosette will begin to sprout. Eventually, the original leaf will wither and fall away.
Pro tip: Not every leaf will sprout. That’s normal! Try a few at once and you’ll increase your chances.
2. Propagating from Offsets (a.k.a. Chicks)
Mature Echeverias often produce small pups—adorable mini-rosettes that cluster around the base of the plant.
These are the easiest way to get clones of your original Echeveria, and they often come with their own roots already attached.
To separate and replant offsets:
- Gently lift the mother plant and loosen the soil around the pup.
- Wiggle or cut the offset free using a clean, sharp knife. Try to take some roots along with it.
- Let the pup callous for a day or two if any cuts were made.
- Pot it up in succulent mix, water lightly, and place in bright, indirect light.
Pro tip: If the offset is very small or rootless, treat it like a leaf cutting and mist sparingly until it establishes.
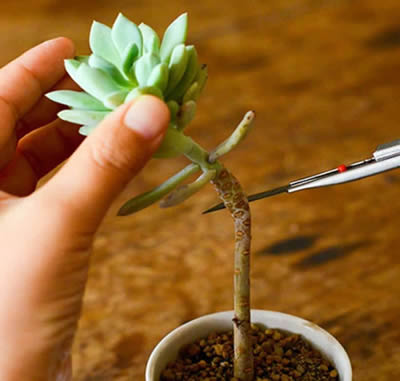
3. Propagating from Stem Cuttings: Great for Leggy Plants
If your Echeveria has stretched out due to low light (a.k.a. etiolated), don’t toss it—turn it into a fresh new plant.
Here’s the fix:
- Use clean scissors or pruning shears to cut off the top rosette, leaving at least half an inch of stem.
- Remove any lower leaves from the stem.
- Let the cutting dry for 2–5 days to callous.
- Plant the stem in dry soil and wait a few days before watering.
- The base of the original stem will often sprout new pups, so you can leave it in place to grow more plants!
Pro tip: Even the removed leaves from the stem can be propagated. Waste nothing!
4. Can You Propagate Echeveria in Water?
Technically? Kind of. But it’s not recommended.
Unlike tropical houseplants, Echeverias are prone to rot when their roots sit in water.
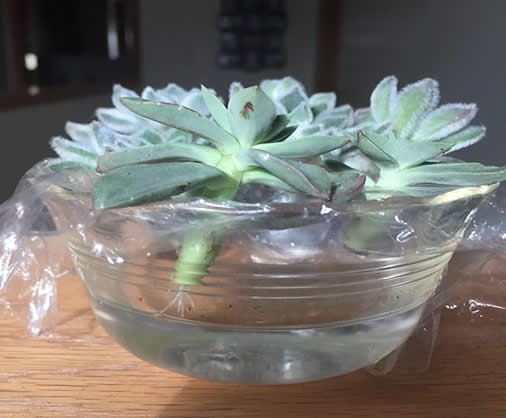
Soil or dry-surface propagation is much more successful for these desert dwellers.
Stick with the dry method—you’ll thank yourself later.
How Long Does Propagation Take?
- Leaf cuttings: 2–4 weeks to sprout roots and pups; several months to reach a transplantable size.
- Offsets: Ready to replant almost immediately, depending on size.
- Stem cuttings: Usually root within 2–3 weeks under the right conditions.
Patience is part of the process—but it’s so rewarding to see that first baby rosette pop up.
Lighting and Conditions for Best Results
- Light: Bright, indirect sunlight. Direct afternoon sun can scorch tender baby leaves.
- Soil: Use a cactus/succulent mix or make your own with potting soil, perlite, and coarse sand.
- Humidity: Keep it low—Echeverias like it dry.
- Watering: Light misting only until roots form. Then water deeply and let soil dry between drinks.
Propagating Echeveria Outdoors: Let Nature Do the Work
If you live in a warm, dry climate (USDA zones 9–11), Echeveria propagation can happen right in the garden with minimal effort.
In fact, many gardeners find that their Echeverias drop leaves or pups naturally, and before long—bam!—tiny new rosettes start appearing in the soil.
Here’s how to encourage outdoor propagation:
- Choose the right location: Pick a sunny, well-drained spot in your garden. Raised beds, rock gardens, or gravelly patches work perfectly.
- Let leaves callous naturally: When propagating leaf cuttings outdoors, still allow them to dry for a couple of days in a shaded area before placing them on the soil. This helps prevent rot from morning dew or surprise rain.
- Place cuttings on top of dry soil: No need to bury them—just press them gently into the surface and let them rest.
- Water sparingly: Rain might be enough, but if it’s been dry for a while, a light mist every few days can help roots form. Don’t overdo it—remember, these are desert plants.
- Pup patrol: Keep an eye out for offsets naturally forming around mature plants. These can be left in place to fill in the space or gently removed and replanted elsewhere.
Bonus Tip: Echeverias propagated outdoors often grow faster thanks to natural sunlight, air movement, and seasonal rhythms. Just watch out for pests like snails or excessive moisture if your area gets rainy.
How to Care for Newly Propagated Plants
Once your propagation project takes root and you see healthy growth, it’s time to treat your new plant like a mature Echeveria:
- Pot it in a small container with excellent drainage.
- Move it into a sunnier spot to encourage color and compact growth.
- Water sparingly, using the soak-and-dry method.
Before you know it, that one little leaf will be a full-grown rosette—and you’ll feel like a succulent whisperer.
Common Mistakes to Avoid
- Overwatering: Biggest propagation killer. Leaf cuttings rot easily in wet soil.
- Too little light: Slows down growth and encourages legginess.
- Pulling instead of twisting leaves: Damaged leaves won’t propagate well.
- No patience: It really does take time—don’t give up too soon!
Propagation Wrap-Up
Once you get the hang of it, Echeveria propagation is wildly rewarding and surprisingly addictive.
Whether you’re multiplying your favorites, rescuing a leggy plant, or just experimenting with what’s possible, Echeveria makes it easy and fun.
Be sure to read our article about caring for Echeveria.