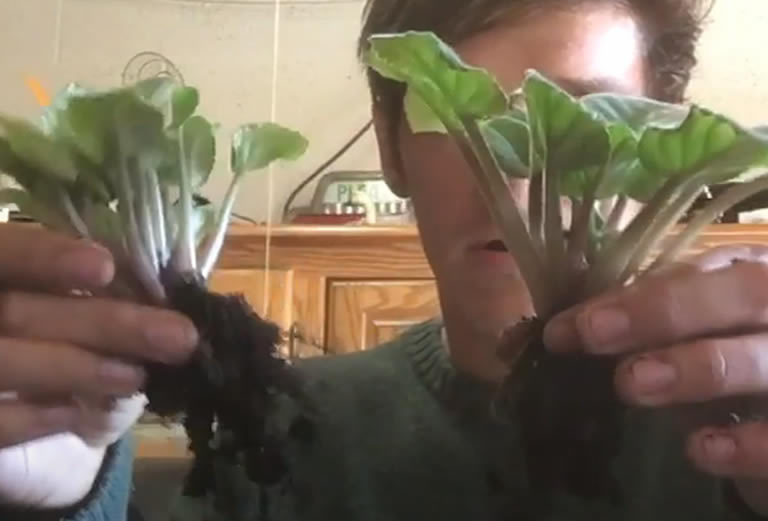
In this article I cover everything you need to know to successfully divide an african violet for the cultivation of another plant.
Table of Contents
Can african violets be divided?
I have previously covered the subject of propagating african violet cuttings in water here but what about dividing an actual african violet plant, is it possible?
African violets can be divided when a crown appears by cutting down the middle of the crown.
The dividing process must be done with care as crowns and foliage are delicate and easily damaged.
African violets can also be divided at the roots if there are multiple foliage clusters on the plant.
There are two methods for dividing or splitting african violets. They are:
- Splitting the plant by cutting it down the middle of a newly formed crown.
- Dividing different foliage clusters at the root level.
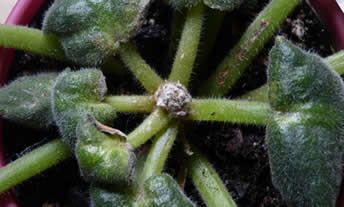
When it come sto splitting the plant at the crown you do this with a sharp knife by cutting the plant in two at the middle of the crown.
You can see a crown forming in the center of the african violet foliage in the image above.
When this happens the plant can be divided by literally cutting the plant in two. You do this by slicing the plant along the middle of the crown to form two new plants from one.
African violets can develop more than one crown and each crown and be split and divided with each side being used to propagate and entirely new plant.
If you choose to take this route for dividing your african violet then once the plant has been split follow the directions below for repotting.
It is possible to separate an african violet but only under specific conditions
We can see that we can split an african at the crown, when a crown appears, in order to create two plants from just one.
But how do you separate an african violet when there is no crown on the plant?
You can only split an african violet via cutting it in two, when a crown appears on the plant.
By splitting the plant down the center of the crown you can you separate one plant into two plants.
However, a better and easier way to separate an african violet is to separate foliage clusters at the roots.
I will now cover the vital information you need in order to divide an african violet by separating foliage clusters at the roots.
I will also cover how to repot the plants once you have separated your african violet.
How to divide and repot African violets
Below are the simple steps you need to take to divide and repot an african violet:
- You can split the african violet down the middle of the crown when a crown appears on the plant to create 2 plants from 1.
- Alternatively, if multiple foliage clusters exist on the plant then you can simply separate them at the roots to create 2 or more plants. This is my preferred method of separating an african violet.
- Repot the newly separated plants into separate pots with soil that is slightly acidic and moist.
It really is that simple. However, below I will walk you through the entire process of dividing your african violet at the roots and show you the best practice for repotting the plants.
Start by gently removing the plant from its pot.
Remove as much access soil as you can to expose the roots.
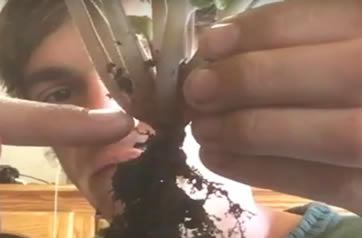
Then gently loosen up the roots with your fingers concentrating on the area between the foliage clusters.
You can see what I mean by this in the image below.
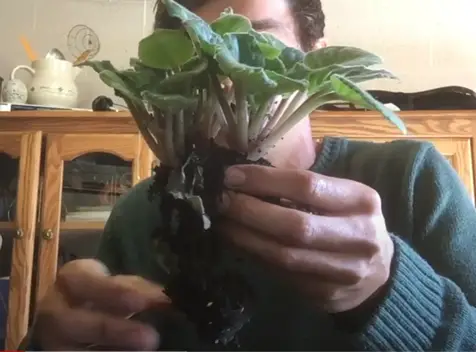
By gently loosening the roots from the soil it is easy to see where one foliage cluster is separate from the other.
By continuing to loosen the roots from the soil the two clusters will easily separate without much effort, as shown below.
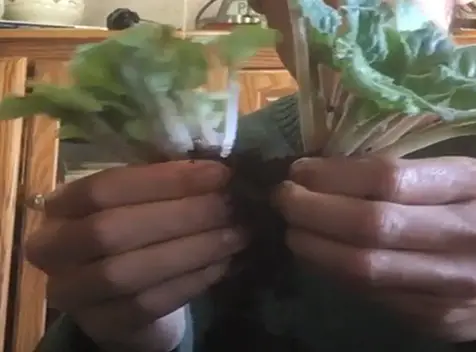
Once the foliage clusters have separated you now have two plants where before you only had one.

You can see in the image above how each foliage cluster can now be used as a separate plant.
The correct way to repot your african violets
Repotting african violet should be fairly standard practice for you because these plants require regular repotting even when you do not divide them.
If you are not regularly repotting your african violets then you should start.
On average african violets need to be repotted at least once per year.
This plant does not like to be root bound. So the information I now give you should also be useful a year from now when your newly divided african violets have matured and require repotting.
Be aware that when repotting african violets you do not necessarily have to plant them into a bigger pot.
The main reason for repotting african violets is to prevent them becoming root bound.
So with existing plants that need repotted be sure to gently loosen up the roots after you have removed the plant from its pot before repotted it in new soil.
Anyway, back to potting your divided african violet. To repot your divided african violets follow the procedure below.
The best type of pot for african violet is a shallow wide pot that allows for root growth. African violet roots grow outward rather than downward so a wider pot is better.
Many cultivators of houseplants will use pots specifically designed for plants that are watered from the bottom and these work exceptionally well for african violets.
They tend to be a little bit more expensive than a standard shallow wide pot but are worth the investment if you want a more hands-free care routine.
If you go with a standard plastic, terracotta or glazed pot be sure it has adequate drainage as an african violet should never sit in water or soaked soil.
Be sure you have the correct soil for your african violets before you repot them.
Although most common houseplant soils will suffice at a pinch I would suggest you take every action you can to ensure your newly divided plants have the best chance to thrive.
I use Miracle-Gro african violet potting mix soil as it is slightly acidic and has everything an african violet needs to thrive.
I would also advise you to use this type of soil if you plan to propagate african violet cuttings in soil rather than water. Be sure to also use the rooting trick I mentioned above for maximizing your success rate.
Now that you have your plants ready to pot, place just over a quarter of a pot’s worth, or up to a half pot’s worth, of soil into the pot before placing your african violet on top of it.
You want to have the soil covering the base of the leaf stalks, about an inch or so above the roots. See the image below.
Once you have placed the plant into its container gently and carefully fill around the plant with handfuls of soil.
Be very gentle when handing the foliage.
African violets don’t really like to be handled as the leaves are fairly rigid and do not like to be flexed or overly manipulated (one reason to keep your pets away from your plant).
Then just treat each new plant with the same care routine that you gave your original african violet and your plants should thrive and start producing blooms in no time.
You might want to consider using a technique known as tenting though if you really want to give your new plants the very best chance of maturing.
This technique is often used in nurseries to help accelerate the growth of new plants and is especially beneficial to african violets.
I actually promote this technique when I talked about the best processes for treating overwatered african violets that have developed root rot. Be aware though that the technique is very effective for creating the perfect humidity levels for cuttings and divided plants as well.
You can use a specially designed plant tent a glass or plastic humidity dome or just a plastic bag if your new plant is small.

